The Studio
The main form of the studio provides the following functionality:
- Load and save test configurations to an XML format
- Create or edit configurations
- Launch independent test windows
Adding suites
Test Suites are collections of test procedures. They act as folders in which you can organize your tests. Aegis comes with recommended test suites for each protocol that you can find in the tests subdirectory of your install, typically:
C:\Program Files (x86)\Automatak\Aegis Fuzzer\tests
When the Studio first starts up, the tree view is empty. You can load a configuration via the File menu or you can define an initial test suite by clicking New.

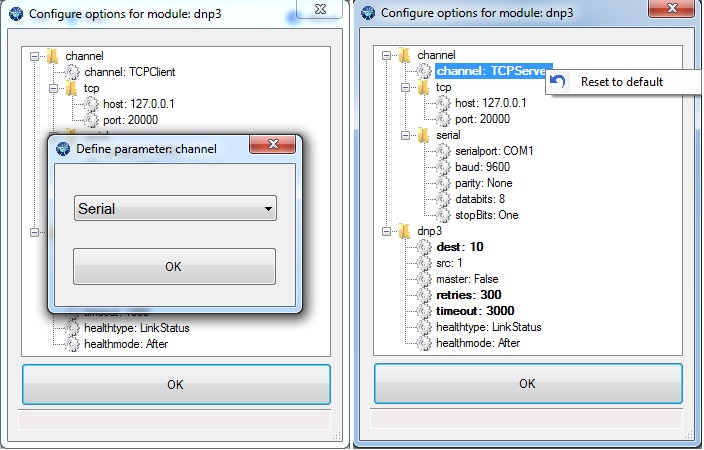
You are presented with a set of configuration options that are applied to every procedure within the suite. A description of each option is available in a tooltip by hovering over the option name.
The first grouping, channel, allows you to configure the communication channel used for every test in the suite. You can double click on any option (marked by a gear) to change the value. Values that are modified from their default settings are marked in bold. You can return any setting to its default by right clicking and selecting Reset to default.
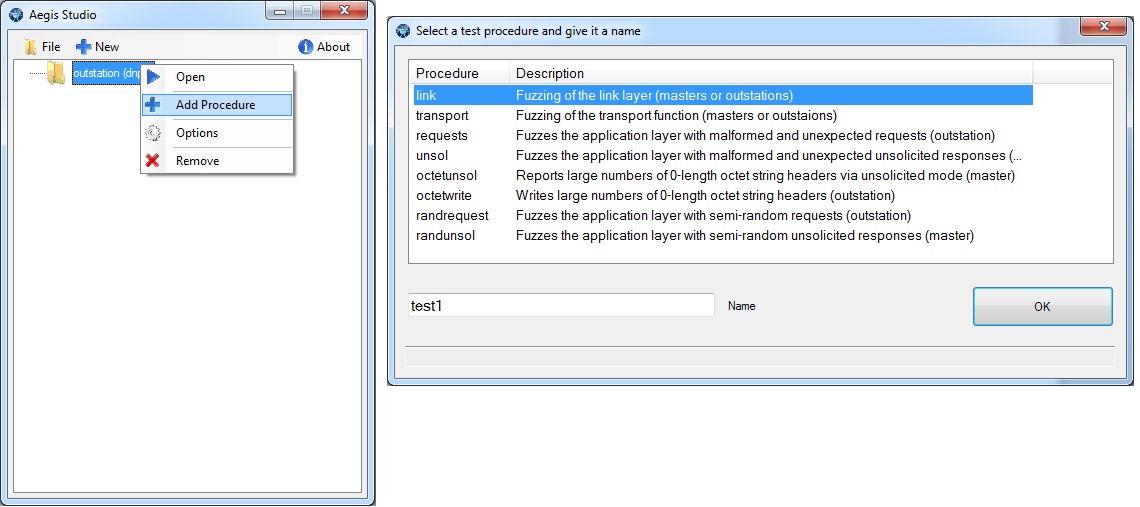
Adding procedures
Procedures are specific sets of test cases that can be individually configured and run. They appear in the main Studio form as a two circulating arrows underneath suite folder(s). You can add a procedure to a suite by right clicking on a suite node in the tree and then clicking Add Procedure.
You can reorder procedures within a suite by dragging and dropping the procedure nodes onto each other.
Generic options
Each test procedure has a number of generic options that can be configured in addition to any per-procedure options.
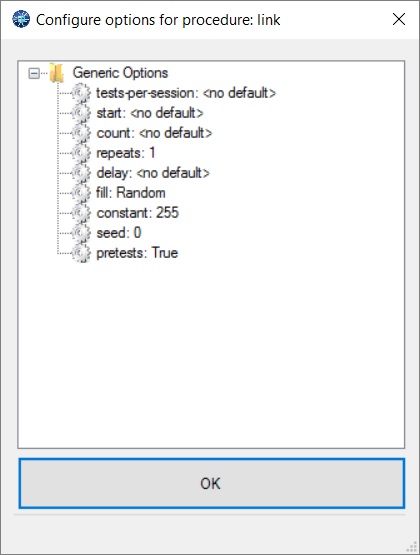
- tests-per-session - The number of tests to run in a single communication session. Setting this value to 1 resets the connection for every test.
- start - Start testing a particular test case id.
- count - Limit the number of test cases to the specified count.
- repeats - Repeat the specified test sequence (all settings) more than once. Useful for stressing non-fatal or non-deterministic bugs.
- delay - The number of milliseconds to wait between test cases. Also useful for delays between connection requests.
- fill - Specifics the source the "fill" value for non-random constant data.
- constant - The byte value to use for constant-fill mode.
- seed - The seed to use for the pseudo-random number generator.
- pretests - Some modules implement handshaking to run at the beginning of each communication session called "pretests". Setting this value to false disables this handshaking.
Start and count are the most frequently adjusted parameters by the user. Most of the other values already have reasonable defaults in the install-included test plans.
Running Tests
You can launch a suite by right clicking on a test suite and selecting Open.
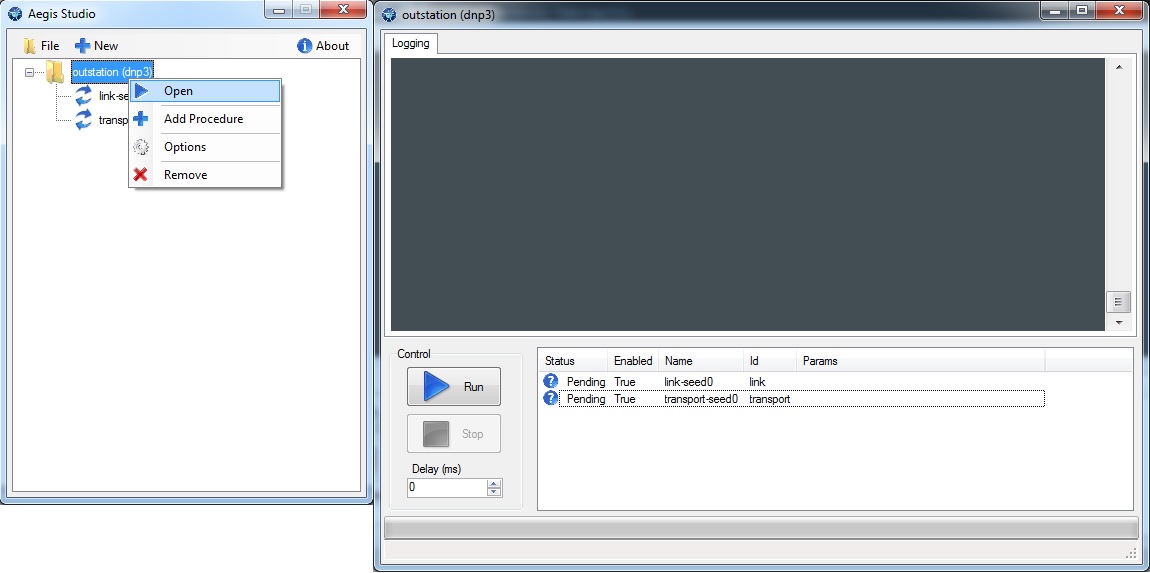
This action launches an independent test window with a list box of all the tests in the suite. By default, all procedures are enabled to run in sequential order. You can disable individual test procedures by right clicking and selecting Disable. Clicking the Run button initiates the test sequence. You cannot adjust any parameters while the tests are running.
Log Window
The top panel is a running log with a built-in protocol decoder. You can right-click the log window to see available options.
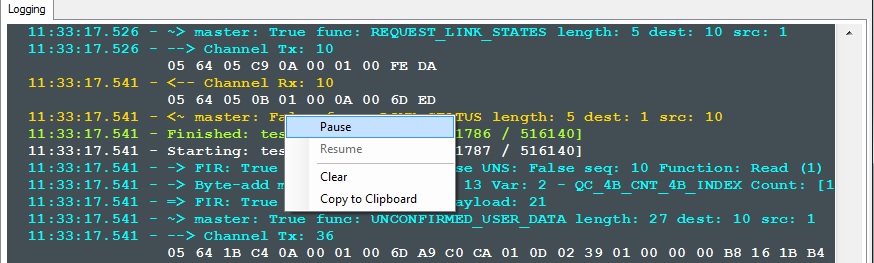
- Pause - Pause the window so that contents are not overwritten. This action does not pause the test itself.
- Resume - Resume logging to the window.
- Clear - Clear the log window contents.
- Copy to Clipboard - Save the contents to the clipboard where they can be pasted into text files.
Double-clicking the log window toggles the pauses or resumes logging. A paused window displays a red border.
Procedure Info
An icon is displayed in the list box for each test procedure indicating its current state.
![]()
- The first column displays the current state of the procedure. { Pending, Running, Failed, Canceled, Success }
- You can exclude individual tests from the test sequence by right-clicking and selecting Disable.
- The user supplied name and module-unique Id field are displayed for reference.
- The final column, Params, displays any non-default settings. This includes overridden module/channel settings.
You can override procedure settings for each test by right-clicking on its row and selecting Options. Changing settings in the test window does not modify the values in the XML configuration. If you want to permanently change settings, you must do this from the main form.
Progress Indicators
There are a number of indicators of progress available. While a test is running, a progress bar is updated that displays the current test case#/total, current tests/sec, and an estimated time to completion.
